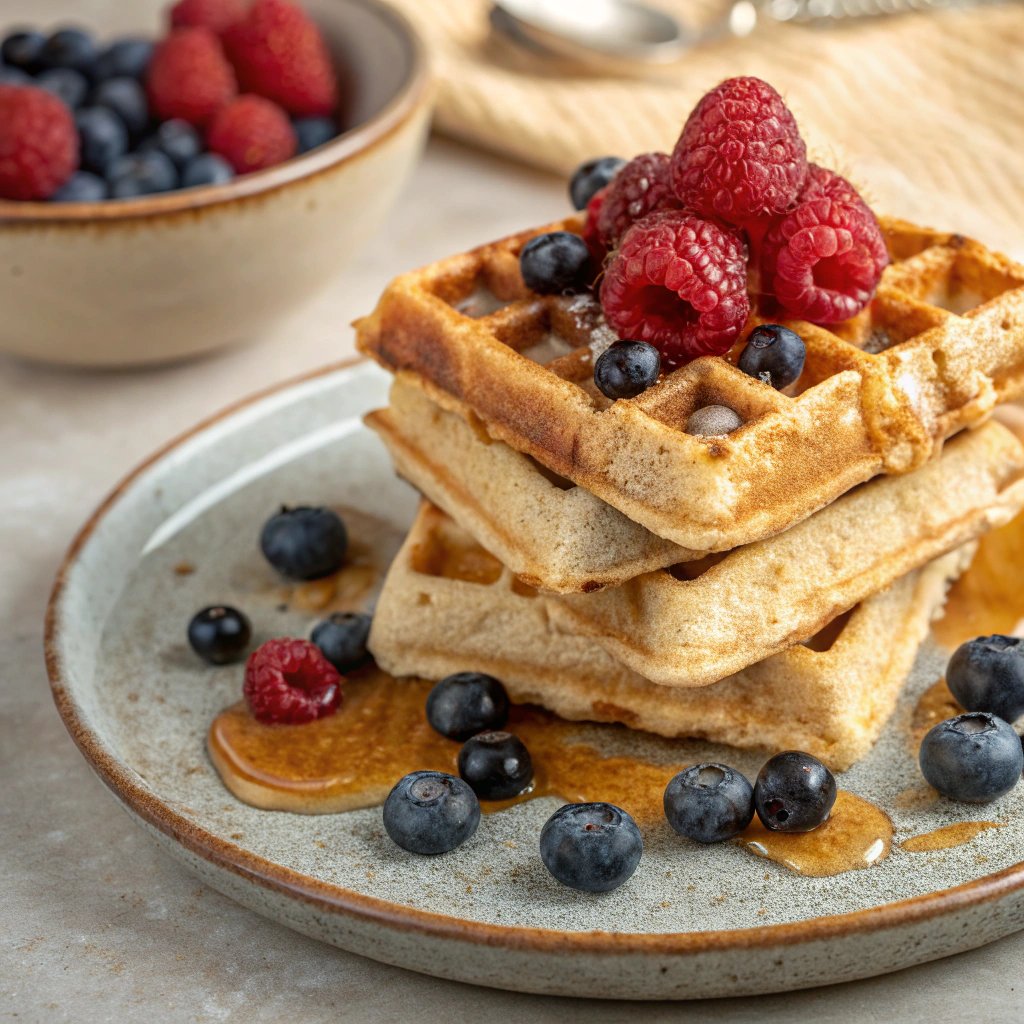
My favourite Sunday breakfast is waffles — I absolutely love them. These gluten-free buckwheat waffles have become my go-to recipe. There’s just something cosy and indulgent about sitting down to a warm, golden waffle, especially when you’ve made it from scratch.
Over the years, I’ve tested so many different gluten-free waffle recipes. Some were too heavy, others were stodgy, and many stuck stubbornly to the waffle maker — or just didn’t taste great. But this recipe works beautifully. It’s light and fluffy, holds together perfectly, and works without fail every single time.
These waffles aren’t overly sweet on their own, which I actually love — because it leaves plenty of room for sweet toppings like maple syrup, fresh berries, or even chocolate. You can also dress them up savoury if you prefer. However you serve them, they’re simple, reliable, and so satisfying.
Why You’ll Love This Gluten-Free Buckwheat Waffles Recipe
- Fluffy and light – not heavy, dense, or gummy like many gluten-free waffles
- Reliable texture – they hold together beautifully and don’t stick in the waffle maker
- Naturally dairy-free – made with almond milk and avocado oil, no butter or yoghurt needed
- Not overly sweet – lightly sweetened with coconut sugar so you can customise with toppings
- Ready in minutes – simple, one-bowl batter and minimal prep
- Freezer-friendly – great for batch cooking or make-ahead breakfasts
- Flexible – works with different flour blends, and doubles as a pancake batter too
Ingredients & Substitutions
- Gluten-free plain flour – A neutral base that keeps the waffles light. Use your preferred GF flour blend (without added xanthan if possible, since we’re adding it separately).
- Buckwheat flour – Adds structure, fibre, and a subtle earthy flavour. You can adjust the amount or even make them 100% buckwheat (see tips below).
- Coconut sugar – Lightly sweetens the batter without overpowering. You can substitute with brown sugar or caster sugar if preferred — avoid liquid sweeteners like maple syrup, as they may affect the texture.
- Baking powder – Helps create that fluffy rise.
- Xanthan gum – Helps bind the batter and improves texture. If your gluten-free flour blend already contains xanthan, you can reduce this to ¼ teaspoon rather than leaving it out completely.
- Salt – Just a pinch to balance the flavour.
- Almond milk – Any dairy-free milk will work: oat, soy, coconut, or rice.
- Avocado oil – A neutral, healthy oil that gives a soft texture without any greasiness. Olive oil or melted coconut oil also work.
- Egg – Helps create structure and lift. I haven’t tested this one egg-free yet, but it may work with a flax egg or egg replacer if needed.
Tips for Getting It Right
- Preheat your waffle maker properly – This helps the waffles cook evenly and crisp up without sticking. Don’t skip or rush this step.
- Grease the waffle plates if needed – I use the waffle maker listed in the equipment section below and find I don’t need to grease it beforehand. But every machine is different, so adjust based on yours — a light brush of oil can help prevent sticking with some models.
- Don’t overmix the batter – Mix until just smooth. Overmixing can make the waffles dense or affect the rise.
- Adjust cooking time to your machine – In my waffle maker, each batch takes about 7 minutes. I keep the oven on low (not fan mode, as that tends to dry them out) and place the cooked waffles inside to stay warm while I make the next batch. You could also leave the first batch on the side and pop them in the toaster to reheat when you’re nearly done.
- Serve straight away or reheat in the toaster – They’re best enjoyed fresh, but reheating in the toaster brings back that crisp edge if you’re eating them later.
A Note on Buckwheat Flour
I like using a mix of buckwheat flour and gluten-free plain flour in this recipe — it gives a lovely balance of structure and lightness, with a subtle nutty flavour from the buckwheat.
That said, this recipe is very flexible. You can make the waffles with 100% gluten-free plain flour for a slightly lighter, more neutral taste, or go for 100% buckwheat flour if you prefer a heartier texture and more earthy flavour. The all-buckwheat version will be slightly denser but still fluffy and satisfying. Both options work well — it just depends on your preference.
Pancake Option
You can also use this exact batter to make fluffy American-style pancakes. Just heat a non-stick pan over medium heat, lightly grease, and spoon in the batter. Cook for 2–3 minutes until bubbles form, then flip and cook for another 1–2 minutes. They turn out soft, light, and just as versatile with toppings.
Serving Suggestions
These waffles are best served warm and can be customised to suit whatever you’re in the mood for — sweet or savoury. Here are some favourite ideas:
- Classic & Sweet – Topped with fresh berries and a drizzle of maple syrup
- Comforting – Sliced banana and a spoonful of almond butter
- Creamy – A dollop of coconut yogurt and a sprinkle of cinnamon
- Seasonal – With stewed apples or pears in autumn and winter
- Fruit Compote – These pair beautifully with a simple fruit compote — try my blueberry version (coming soon!) for a naturally sweet topping
- Indulgent – Melted dark chocolate or a few dairy-free chocolate chips
- Savoury option – Omit the coconut sugar and serve with avocado, roasted veg, or a poached egg for a brunch-style waffle
These also toast well if you’re reheating leftovers — the edges crisp up again nicely.
Storage Tips
- Short-term: These waffles are best fresh, but leftovers can be cooled and stored in an airtight container for up to 2 days.
- Reheating: Pop them in the toaster or oven to bring back the crisp edges. Avoid the microwave if you want to keep the texture light and crisp.
- Freezer-friendly: These freeze really well. Once cooled, place parchment paper between each waffle and store in a freezer-safe bag or container. They’ll keep for up to 2 months. Toast straight from frozen or defrost first, then reheat as usual.
Closing Thoughts
These fluffy gluten-free buckwheat waffles have become a staple in my weekend routine — easy to make, naturally dairy-free, and endlessly customisable. Whether you serve them sweet or savoury, fresh or from the freezer, they’re a reliable go-to for breakfast, brunch, or whenever you’re in the mood for something a little special.
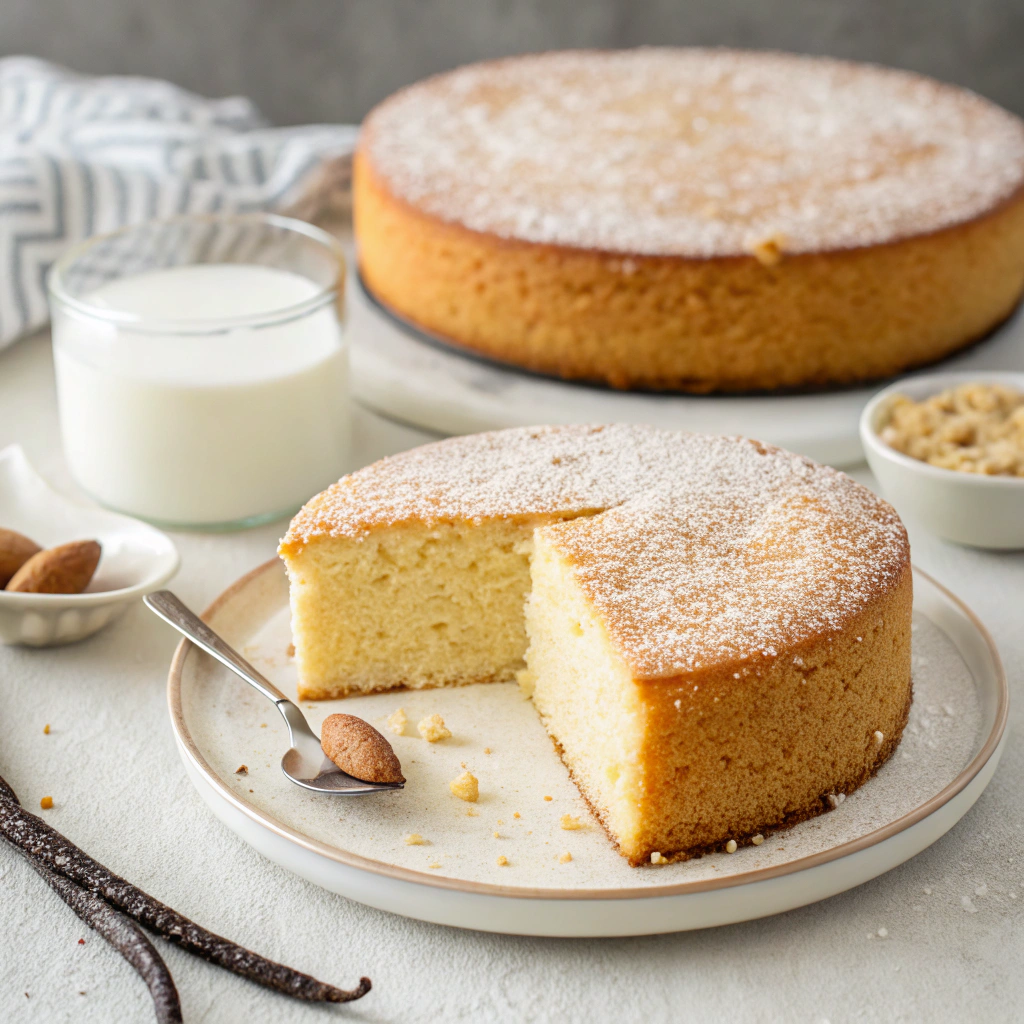
If you’re looking for more gluten-free baking ideas, you might also enjoy my Buckwheat Vanilla Sponge Cake – No Butter, No Dairy — another simple, feel-good recipe that’s perfect for everyday.
If you loved this recipe, feel free to like or share the post — your support really helps me continue sharing clean, hormone-friendly recipes.

Fluffy Gluten-Free Waffles with Buckwheat (Dairy-Free)
Equipment
Ingredients
- 80 g gluten-free plain flour
- 50 g buckwheat flour
- 2 tablespoons coconut sugar
- 2 teaspoons baking powder
- ½ teaspoon xanthan gum
- ¼ teaspoon salt
- 200 ml almond milk or other dairy-free milk
- 2 tablespoons avocado oil plus extra for greasing if needed
- 1 egg at room temperature
- Maple syrup berries, or other toppings to serve
Instructions
Preheat Waffle Maker:
- Heat your waffle maker according to the manufacturer’s instructions.
Mix Dry Ingredients:
- In a mixing bowl, whisk together the gluten-free flour, buckwheat flour, coconut sugar, baking powder, xanthan gum, and salt.
Combine Wet Ingredients:
- In a separate bowl, whisk together the almond milk, avocado oil, and egg.
Make the Batter:
- Pour the wet ingredients into the dry ingredients and whisk until you have a smooth, thick batter.
Cook the Waffles:
- Lightly oil the waffle plates if required. Pour half the batter into the waffle maker, close the lid, and cook for around 7 minutes or until golden and crisp. Repeat for the second batch.
Serve:
- Serve the waffles warm, topped with fresh fruit, a drizzle of maple syrup, or toppings of your choice.
Notes
- Fresh berries and a drizzle of maple syrup
- Sliced banana and a spoonful of almond or peanut butter
- A dollop of coconut yogurt and a sprinkle of cinnamon
- Warm stewed apples or pears in autumn
- Dairy-free chocolate chips or a drizzle of melted dark chocolate for a treat
- Short-term: Let waffles cool completely, then store in an airtight container for up to 2 days.
- To reheat: Pop in the toaster or a warm oven to restore crisp edges — avoid the microwave if you want them to stay crisp.
- Freezer-friendly: These waffles freeze well. Place parchment between each waffle and store in a freezer-safe bag or container for up to 2 months. Toast straight from frozen or defrost first and then reheat in the oven or toaster.

Leave a Reply